
I hate to ruin the story, but here's what you have to look forward to:
 |
| Finished product |
In an attempt to spruce up my living room, I recently painted, taking the walls from a very bland off-white to a shade referred to as Secret Moss. This made a world of difference to my living room (in my opinion anyway), which isn't given justice by the following pictures!
 |
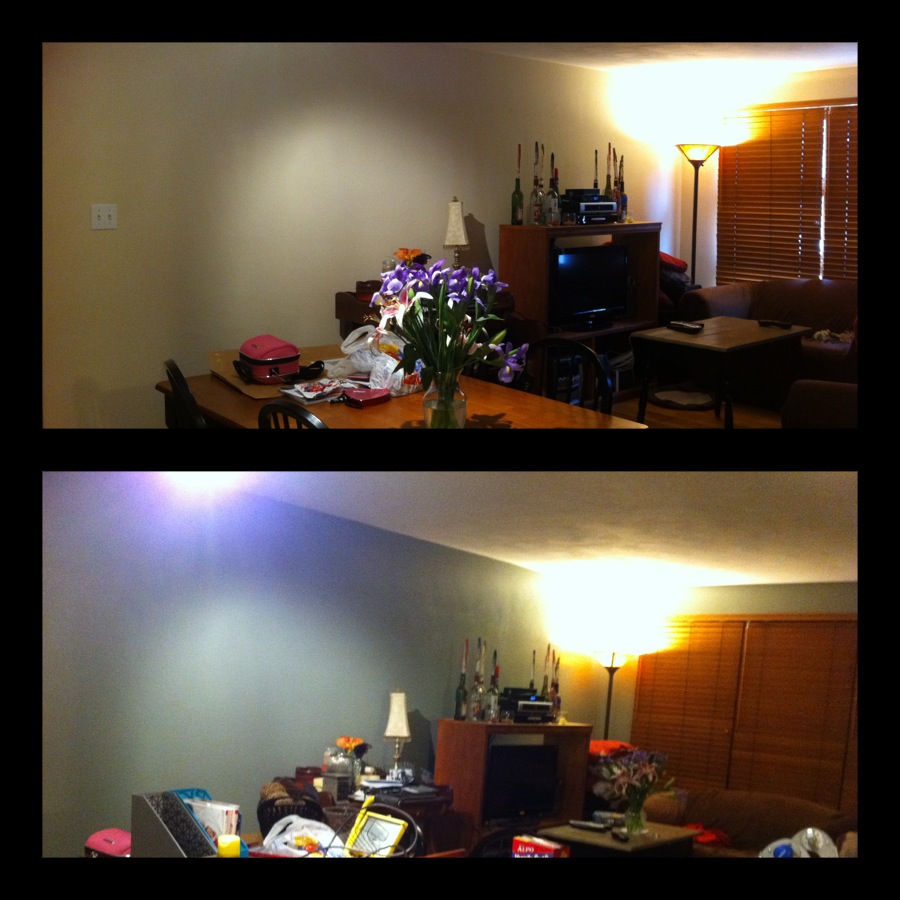
| Above: old; Below: new |
 |
| Above: old; Below: new |
So, in light of the new wall color and the fact that my puppy recently chewed up each of the old throw pillows on couch [which didn't match anyway], I decided we were in serious need of upgraded throw pillows! And I figured I could just do them myself!
So, I decided early on that I wasn't going to risk stuffing the pillows myself. My sister recommended I purchase Euro pillows, which are large and square. I did a little googling and found that Target had their home brand on sale for around $10 a piece. The reviews on Target's web site were mixed: some said that they were incredibly lumpy and worthless, while others said that they didn't have that problem. It was clear that I shouldn't risk buying them online, but that I could test them out in store and see if they were worth it.
 |
| Target Home Euro Pillow: not worth it! |
I ordered some fabric online earlier this week [something I had never done before and was a little nervous about]. Modernfabricstudio.com has fabulously trendy fabric online, very decently priced! Because of the large size of the pillows, I ended up ordering 7 units (3.5 yards) of the fabric. Beware of the coloring difference between viewing fabric on a screen and what it actually looks like in person.
 |
| The difference in colors: left is published online, right is a picture taken with phone. In person, the colors are much more vibrant. The yellow is very strong with almost a yellow-green color. I was expecting more of a creamy yellow, like on the left. |
The easiest way to make a pillow cover in this situation was to cut out two pieces of fabric and sew them together [eventually on all four sides]. Each pillow is a square 26x26". As simple as that might sound, a pattern really was necessary to prevent small mistakes. My handmade patter consisted of wrapping paper cut to 26x26". I originally made it a little larger than it needed to be, but hindsight allows me to tell you now that you might as well make it the exact size, it looks stupid if it's too loose [I was able to fix it before I finished]. So, it's best to cut the pattern to 27x27", allowing for a half inch seam on each side.
 |
| Pattern for cover. The dotted lines represent where to sew. 26" is the finished size, 27" is the size of the fabric. 0.5" is the difference, creating the seam. |
To cut the fabric out, I doubled the fabric over, faces against each other, so that I could cut two pieces at a time. Because my pattern was made of wrapping paper and in a simple square, I used scotch tape to tape it down to the fabric and cut at the outside of the square, pinning the fabric together when I was done. I could take it straight to the sewing machine this way.
I began by sewing three sides together. On the fourth side, I created a center hole to stuff the pillow through by sewing shut about 3.5" each on the outer edges. Once I was done, I rounded each corner of the cover by starting 2.5" out from the corner and letting the fabric kind of naturally turn as it fed through the sewing machine, terminating about 2.5" out from the corner on the adjacent side- this gave me a rounded edge that wasn't too rounded or too square [please see picture below, which, yes, is still confusing].
 |
| The rounded edges: there are two rounded edges because I originally made the cover too large, I had to go back and make it smaller. The set that is correct is the inside set. |
 |
| Similar to a diagonal whip stitch, making it more hidden. |
 |
| After the stitch is complete and the pins have been removed. You can see a little of the green thread peeking out towards the top of the picture. |
Voila, I have a finished throw pillow!
|
| Finished! |
 |
| Remy, excited that she could have the couch back. |
 |
| Remy playing with the new pillows. |
No comments:
Post a Comment